Rescue iTunes music from your iPhone by connecting it to Linux as thought it was a disk drive
One of the increasingly few reasons I have to boot into Microsoft Windows these days is to use iTunes.
Of course iTunes on Windows is famously a horror show. So 99% of the time this is because I want to download any music I bought in the iTunes store to my computer so I can put it into a far better music player; the bonus of iTunes music, for the last few years at least, being DRM free.
But it’s also totally inaccessible if you don’t use Apple’s propietary software as far as I can see. Ugh. Why not just have it downloadable from the web??
Recently iTunes, of course, stopped being able to log into my Apple account. So it couldn’t see, and I couldn’t download, the newer music I’d bought. It has since magically fixed itself but who knows how long it will be until it breaks again, and tbh the less I have to open the Windows the better.
So I was looking for a Linux solution. There are, naturally, no official ones. I braced myself for difficult times ahead but actually it proved surprisingly easy, although not exactly straightforward. Basically, forget iTunes, iCloud etc. Go old-school. I downloaded the music to my iPhone and then sought to connect my phone to my computer to be seen in file manager.
Note that you will not be able to extract any music you haven’t purchased as such like this, i.e. Apple Music downloads. You don’t own that anyway. This is just stuff you actually bought in the iTunes store.
You can use also the below as a method of access lots of other things on your phone too, beyond music. Photos would be a common one.
Anyway, something like this did the trick and let me access the contents of my iPhone just like it was any other folder.
- Install relevant packages
# Install packages that help connect to iPhone
sudo apt install ifuse libimobiledevice-utils
-
Plug the iPhone in via USB. Make sure the phone is unlocked and hit “Trust this computer” and enter in the passcode as requested.
-
Then pair and mount it to a local folder
idevicepair pair

mkdir -p ~/iPhone
ifuse ~/iPhone
Now you should be able to see it in that folder or in file manager.
Once you’re there, you can then use your file manager or whatever to find and retrieve the music:
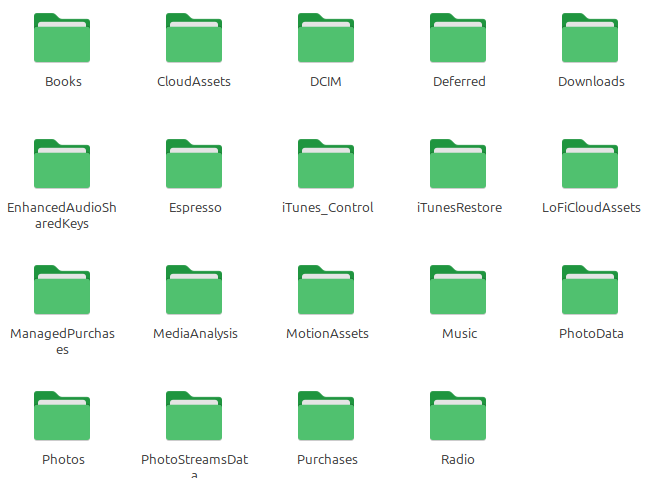
For music, go to Music then Downloads. If it’s not there. look for some other obviouslyish named folder.
Annoyingly the music files all appear with very random seeming titles so you can’t immediately tell which is which. Usually they’re the m4a files. The file’s metadata will be correct though so that’s one way to tell what’s what, or you can do what I did which, given I knew the date I downloaded the music to my phone, just retrieve the files with the appropriate Date Modified.
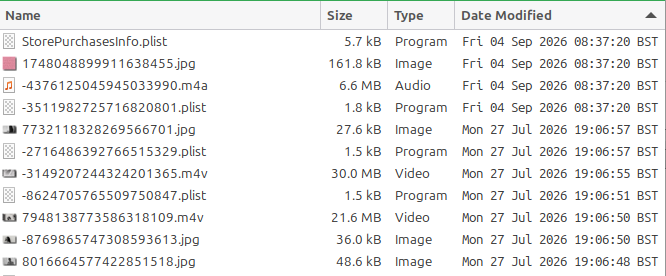
When you’re done, unmount the iPhone:
fusermount -u ~/iPhone
Job done.
Apparently after an iOS update you might have to unpair and pair again like this, but I haven’t experienced that yet:
idevicepair unpair && idevicepair pair # after any iOS update
Note that if you’re on Windows there are various (pay-for) grahical software packages that let you do this kind of thing without iTunes too. iMazing and CopyTrans are some of the more famous examples.